Two ways to add a line item
From inside a campaign — open the campaign, scroll to the line items table and click . The campaign is pre-filled automatically.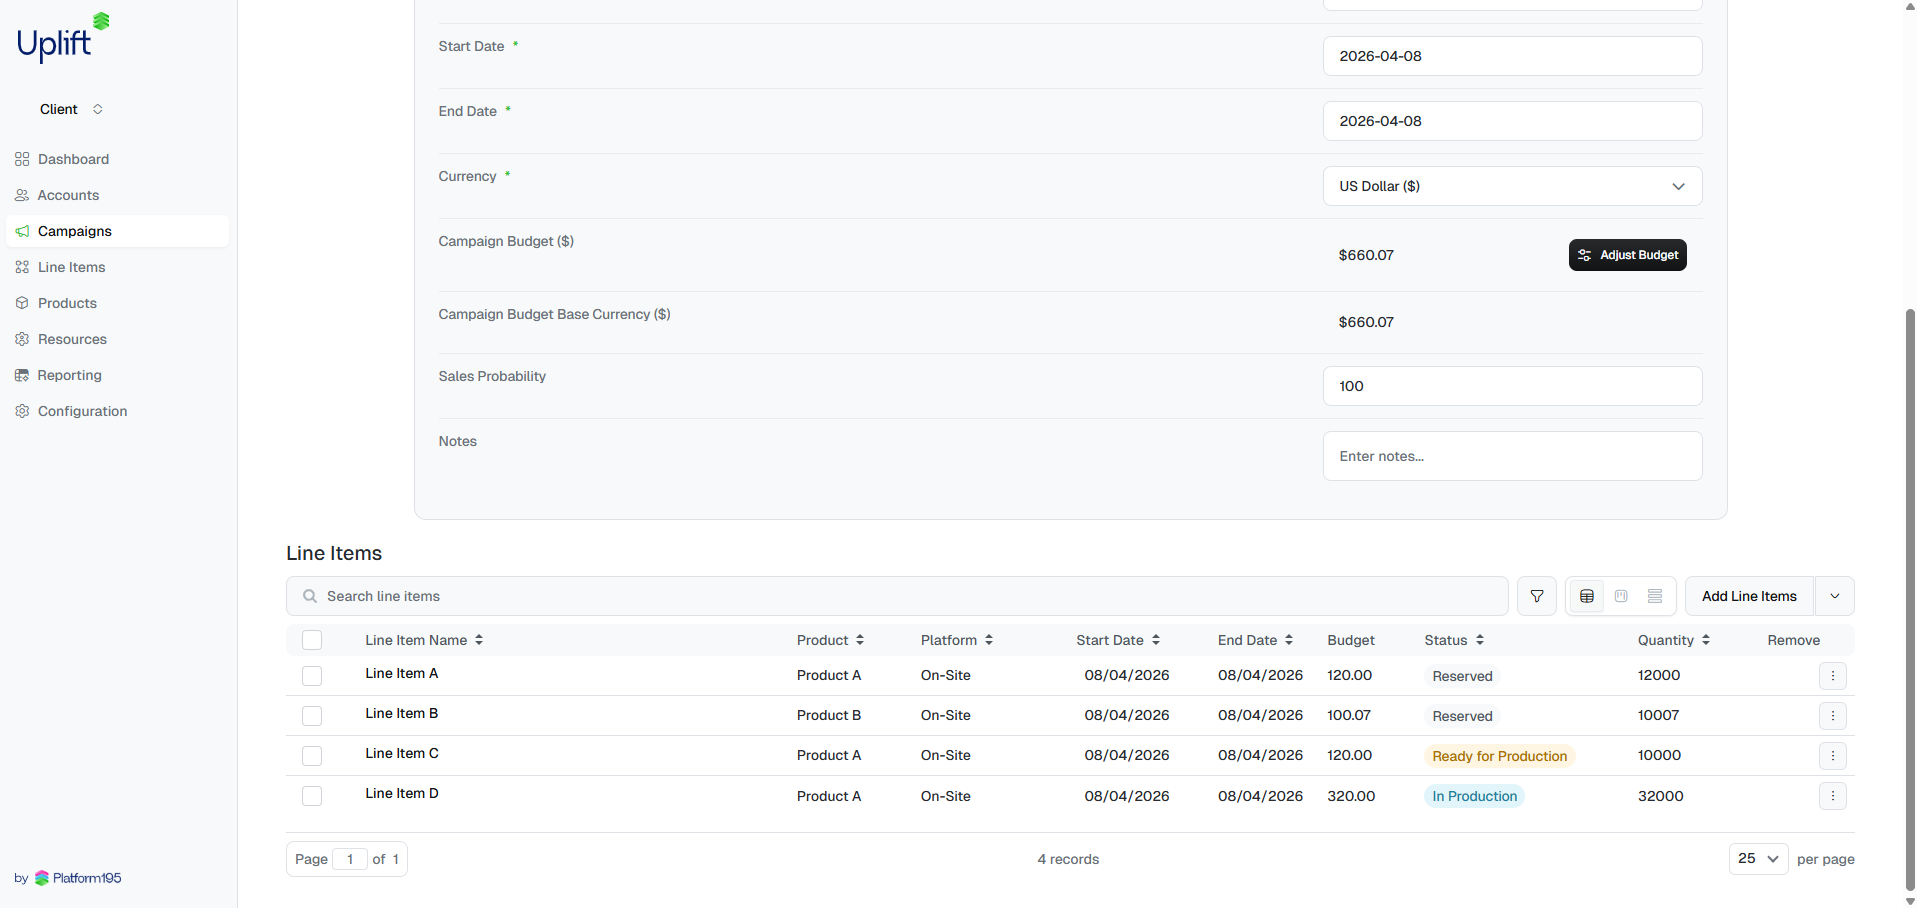
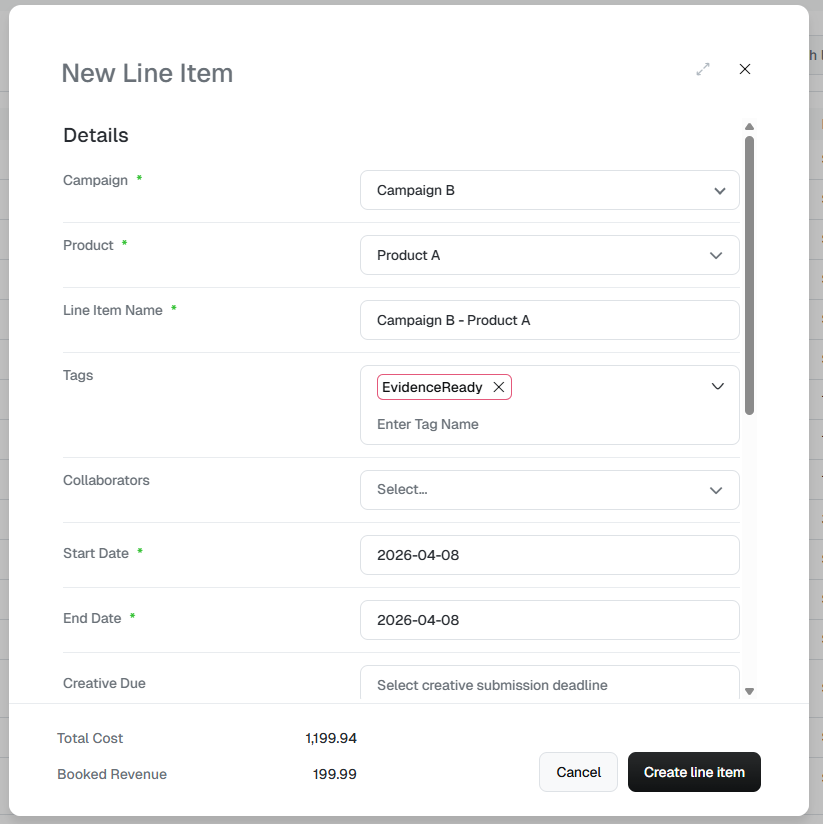
Fill in the form
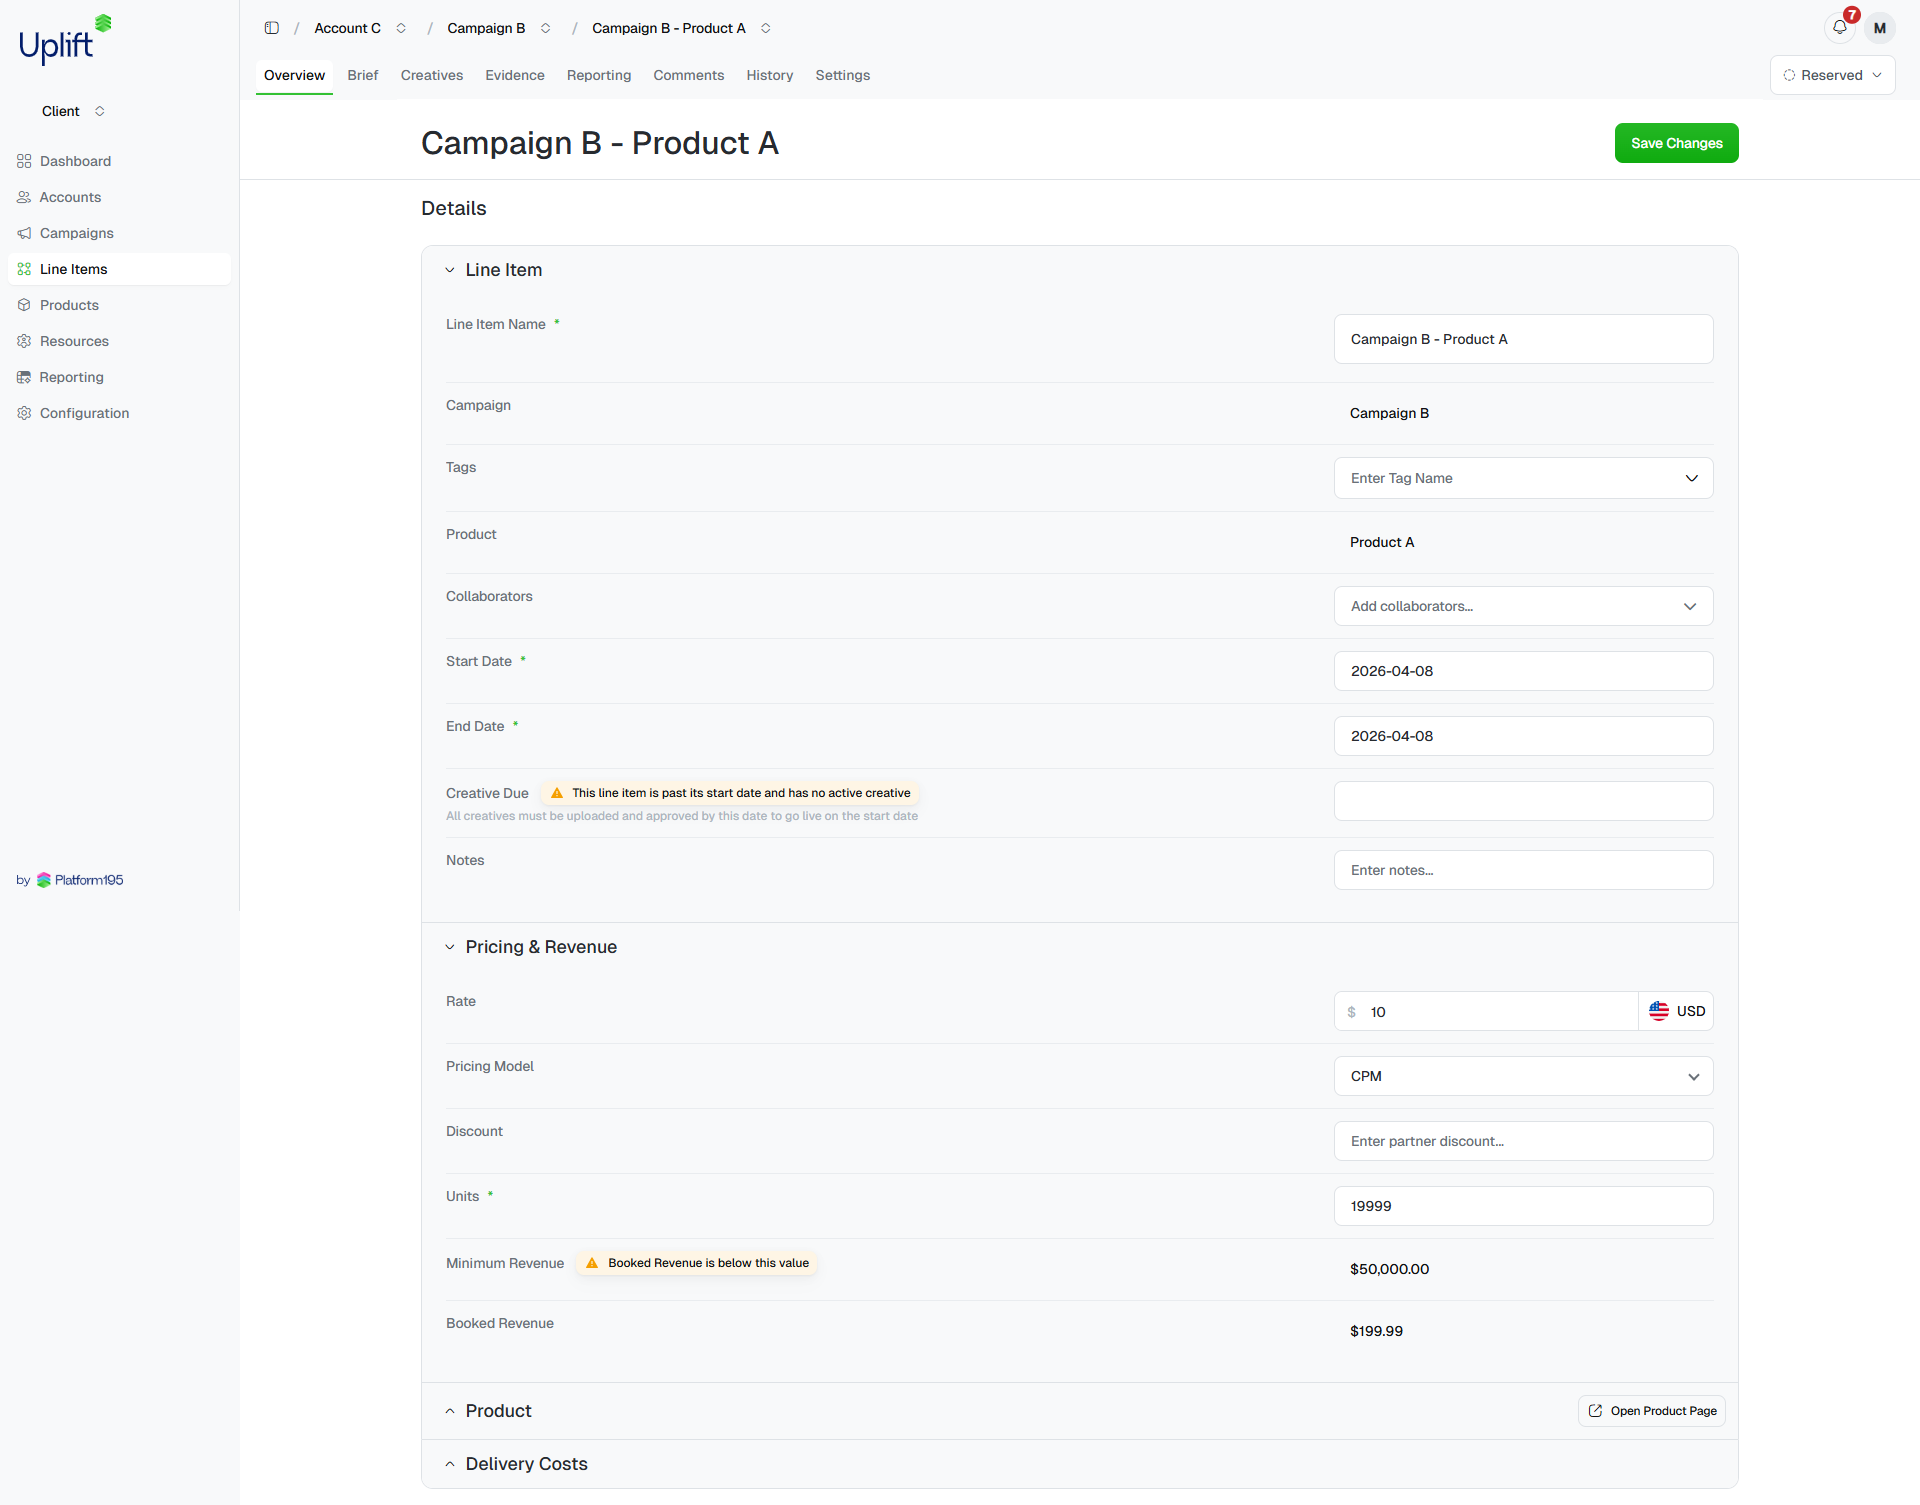
Provide as much detail as possible before saving. The key fields are:| Field | Notes |
|---|---|
| Campaign | Pre-filled if you started from a campaign; otherwise select from the dropdown. |
| Product | The ad product being sold. Not sure which to pick? See the tip below. |
| Market | The geographic or audience market this line item targets. |
| Start / End date | The flight dates for this line item. |
| Units | The volume being sold — impressions, clicks, or other unit depending on the product. |
| Rate | The price per unit. |
| Pricing model | How the line item is charged — CPM, CPC, flat fee, etc. |
After saving
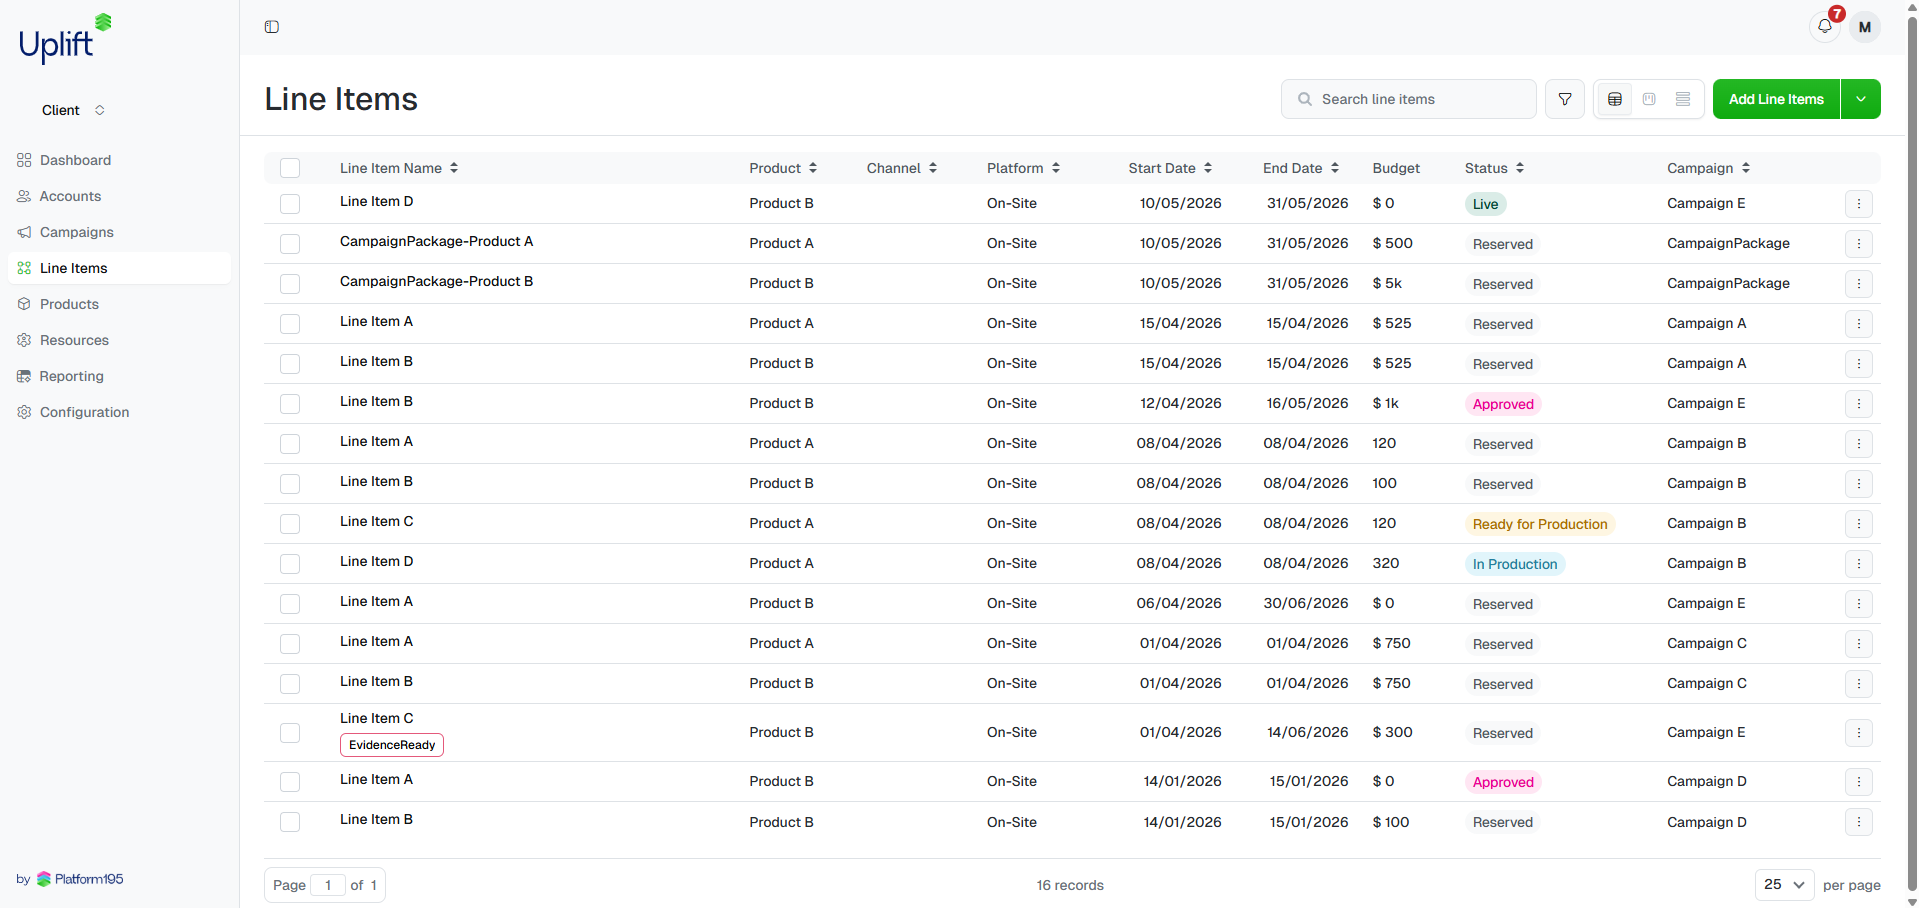
A new line item lands in status. It won’t deliver until it’s set to . Before it can go live you’ll typically need to:- Set assignees and confirm rates — see Assignees & rates
- Apply targeting if the product supports it — see Targeting & forecast
- Upload creatives — see Adding creatives
For Package campaigns, line items are pre-populated with the correct
products and rates. Check the dates and units are correct, then proceed to
creatives and go-live.