> ## Documentation Index
> Fetch the complete documentation index at: https://docs.uplifthub.io/llms.txt
> Use this file to discover all available pages before exploring further.
# Creating a campaign
> Create a campaign that mirrors a contract or insertion order.
export const Pill = ({tone = "live", children}) =>
{children}
;
export const Ui = ({children}) =>
{children}
;
A **Campaign** represents all the components of a sold order — usually mirroring
a contract, purchase or insertion order with a client. You can create a campaign
from two places; the only difference is whether the account field is pre-filled.
## Two ways to start
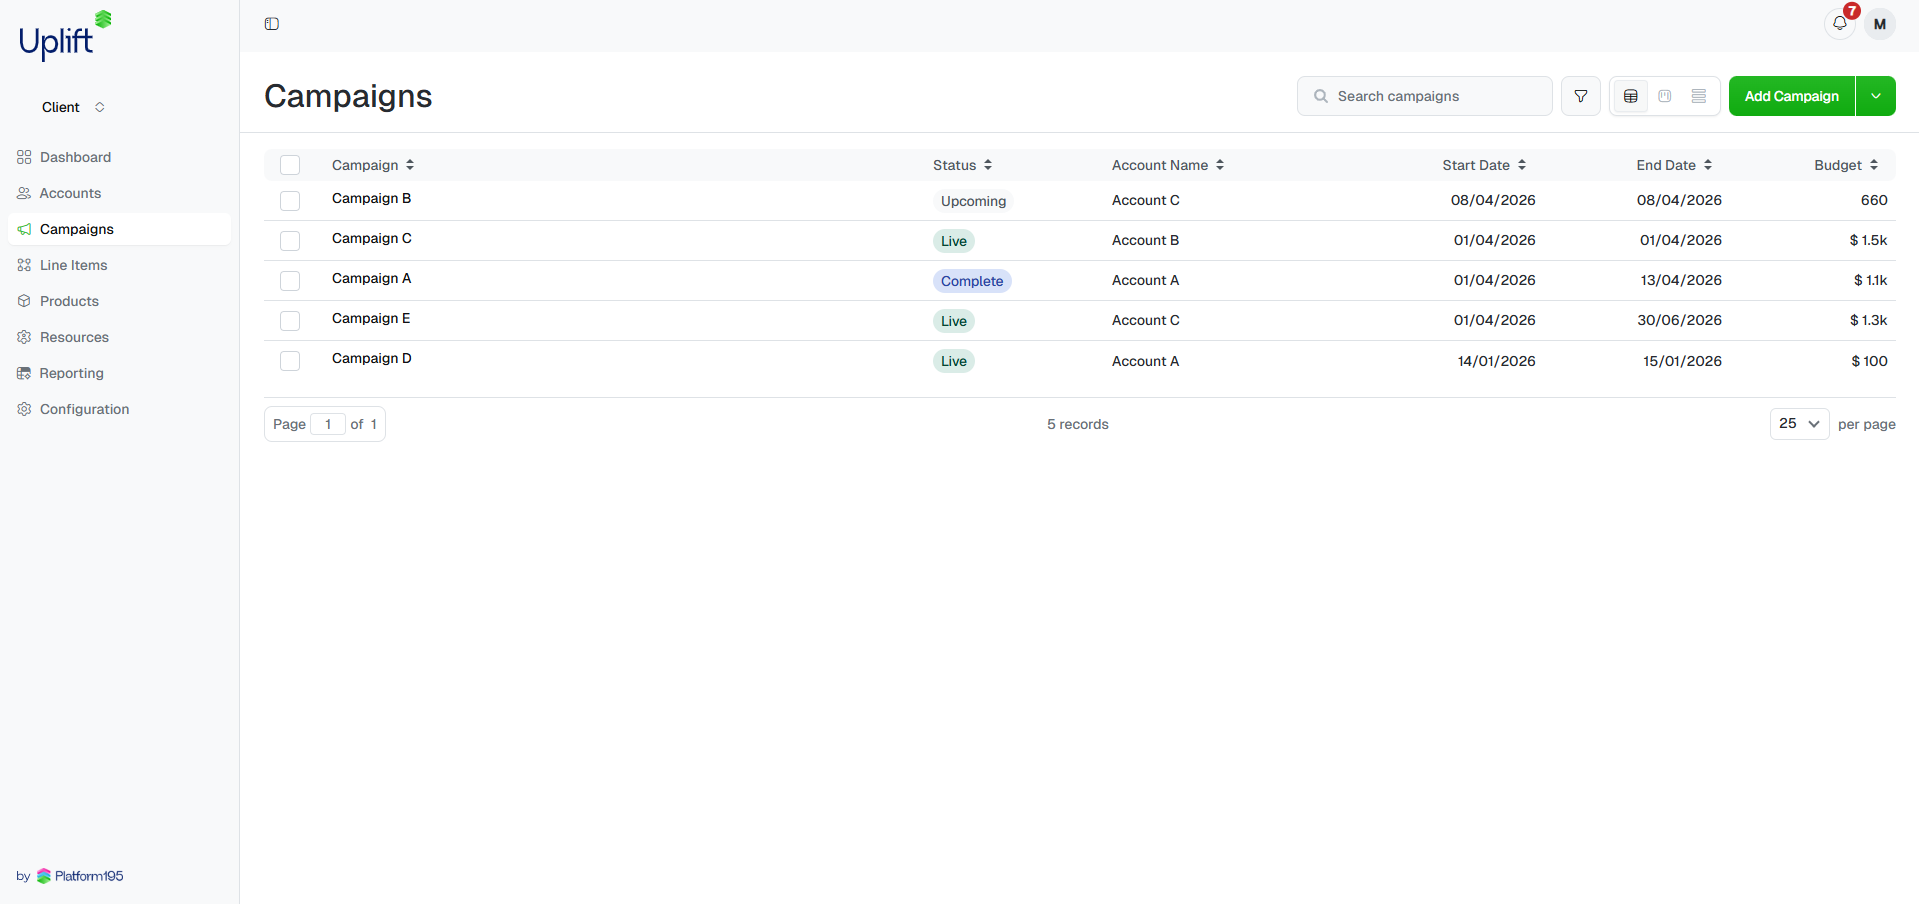
**From the Campaigns table** — select Campaigns from the sidebar, then
click Add Campaign in the top right. The account field will be blank;
you'll need to select the advertiser from the dropdown.
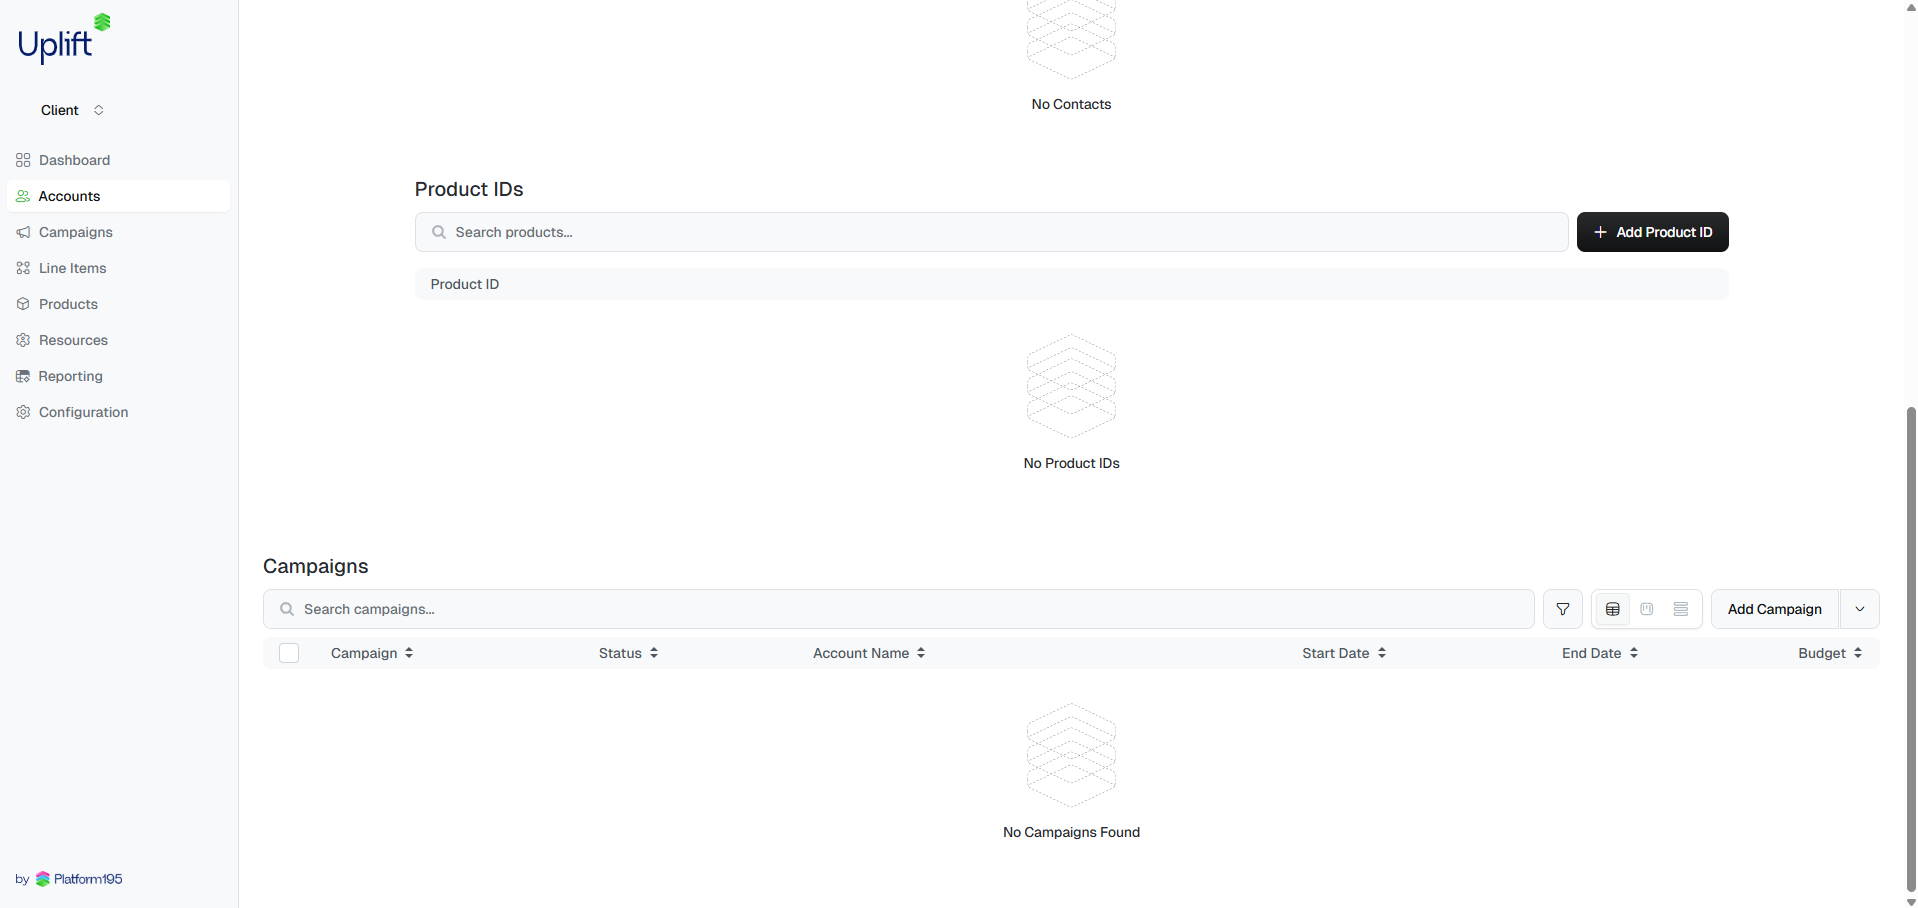
 **From inside an Account** — open the account first, then click
Add Campaign. The account field is pre-populated automatically, saving
a step.
**From inside an Account** — open the account first, then click
Add Campaign. The account field is pre-populated automatically, saving
a step.
 ***
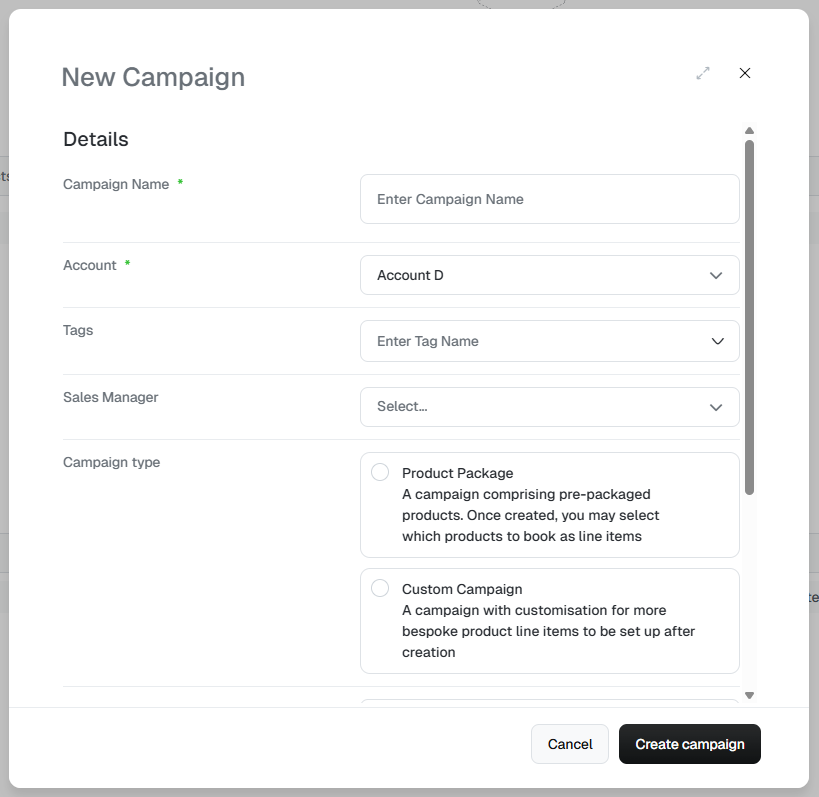
Select either **Package** or **Custom** — this is the only field you cannot
change after saving. See [Package vs Custom](#package-vs-custom) below if
you're unsure which to pick.
Complete the campaign details. Required fields are marked with a red
asterisk **\***. A few fields worth noting:
* **Account** — pre-filled if you started from an account; otherwise select from the dropdown.
* **Currency** — set at creation and cannot be changed afterwards.
* **Sales probability** — use this to indicate how confirmed the campaign is. Set to `100` once the order is fully sold and closed. Useful for pipeline reporting.
***
Select either **Package** or **Custom** — this is the only field you cannot
change after saving. See [Package vs Custom](#package-vs-custom) below if
you're unsure which to pick.
Complete the campaign details. Required fields are marked with a red
asterisk **\***. A few fields worth noting:
* **Account** — pre-filled if you started from an account; otherwise select from the dropdown.
* **Currency** — set at creation and cannot be changed afterwards.
* **Sales probability** — use this to indicate how confirmed the campaign is. Set to `100` once the order is fully sold and closed. Useful for pipeline reporting.
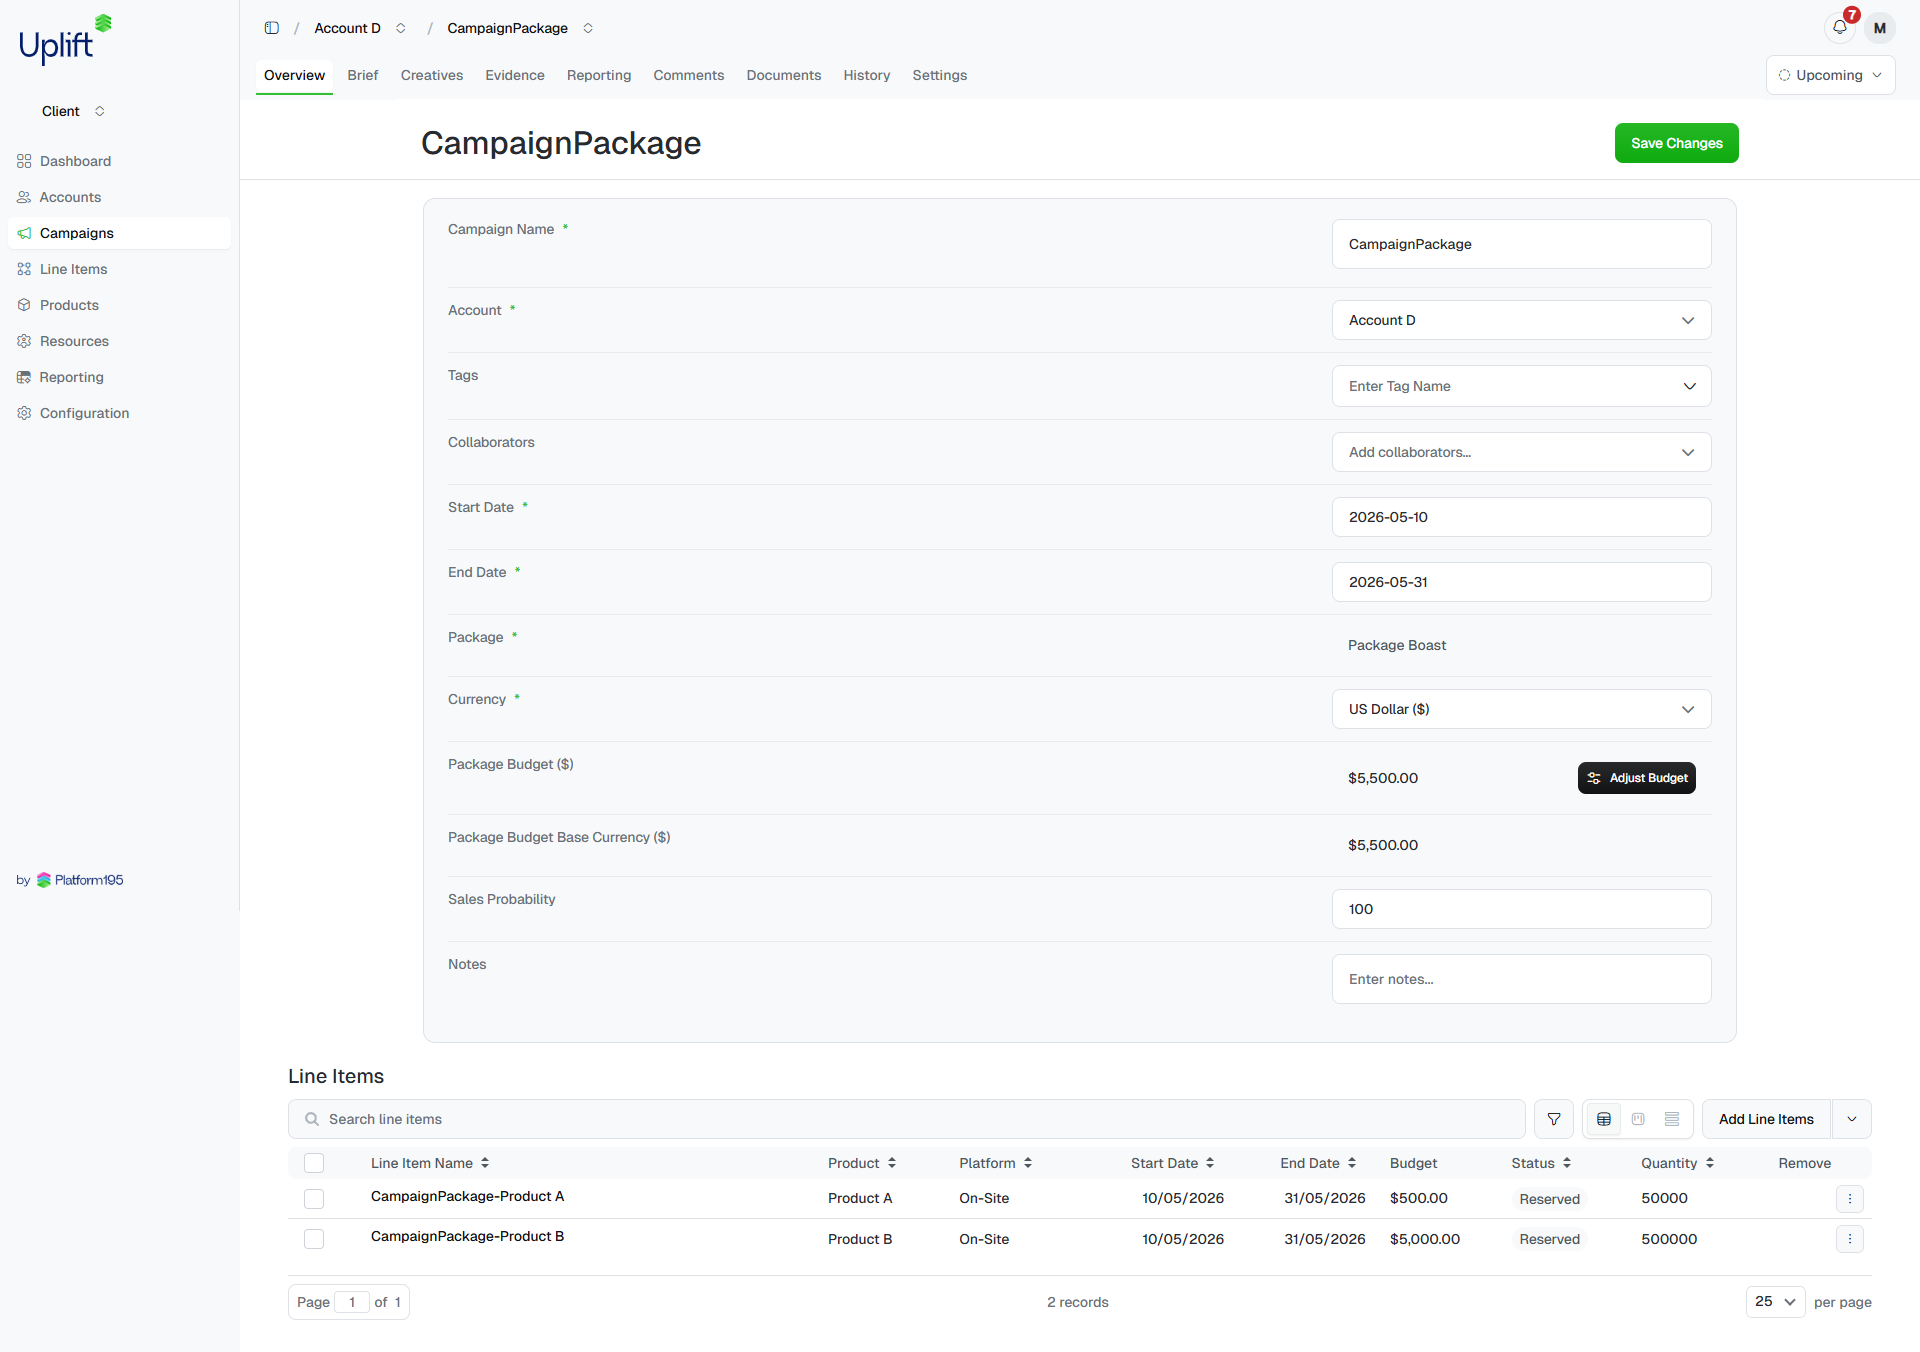
 Click Save when done.
For **Package** campaigns, line items are generated automatically — you'll
see them populated on the campaign immediately after saving. For **Custom**
campaigns, the line items table will be empty; head to
[Adding line items](/setup/add-line-items) to build out the media plan.
Click Save when done.
For **Package** campaigns, line items are generated automatically — you'll
see them populated on the campaign immediately after saving. For **Custom**
campaigns, the line items table will be empty; head to
[Adding line items](/setup/add-line-items) to build out the media plan.
 **Campaign type and currency cannot be changed after saving.** If you pick
the wrong type you'll need to delete the campaign and start again.
***
## Package vs Custom
### Package
A **Package** is a predefined grouping of products sold together. When you
create a Package campaign, Uplift Hub automatically generates the line items
that make up the package — you don't need to add them manually.
Packages come in two forms:
**Fixed packages** — each product's price is locked. You cannot change the
overall campaign budget after creation.
**Blended packages** — each product has a percentage weighting of the total
campaign budget. You can adjust the campaign budget at any time, and each line
item's value updates automatically based on its weighting.
**Blended package example** — a two-product campaign with a £400 budget:
Product A at 25% = £100, Product B at 75% = £300. Change the budget to £800
and it becomes £200 and £600. The weightings stay fixed; the values flex.
Use a Package when the client is buying a predefined bundle and you want line
items auto-populated to match.
### Custom
A **Custom** campaign gives you a blank canvas. You add line items individually
to match the media plan. Use Custom when the sold order is bespoke and doesn't
map to a predefined package.
Not sure which product to select for a line item? Leave a comment on the
campaign's Comments tab. Type **@** followed by a teammate or your
Platform 195 representative to notify them directly.
**Campaign type and currency cannot be changed after saving.** If you pick
the wrong type you'll need to delete the campaign and start again.
***
## Package vs Custom
### Package
A **Package** is a predefined grouping of products sold together. When you
create a Package campaign, Uplift Hub automatically generates the line items
that make up the package — you don't need to add them manually.
Packages come in two forms:
**Fixed packages** — each product's price is locked. You cannot change the
overall campaign budget after creation.
**Blended packages** — each product has a percentage weighting of the total
campaign budget. You can adjust the campaign budget at any time, and each line
item's value updates automatically based on its weighting.
**Blended package example** — a two-product campaign with a £400 budget:
Product A at 25% = £100, Product B at 75% = £300. Change the budget to £800
and it becomes £200 and £600. The weightings stay fixed; the values flex.
Use a Package when the client is buying a predefined bundle and you want line
items auto-populated to match.
### Custom
A **Custom** campaign gives you a blank canvas. You add line items individually
to match the media plan. Use Custom when the sold order is bespoke and doesn't
map to a predefined package.
Not sure which product to select for a line item? Leave a comment on the
campaign's Comments tab. Type **@** followed by a teammate or your
Platform 195 representative to notify them directly.