> ## Documentation Index
> Fetch the complete documentation index at: https://docs.uplifthub.io/llms.txt
> Use this file to discover all available pages before exploring further.
# Create targeting presets
> Save reusable targeting rules for line items and value lists for creatives.
export const Ui = ({children}) =>
{children}
;
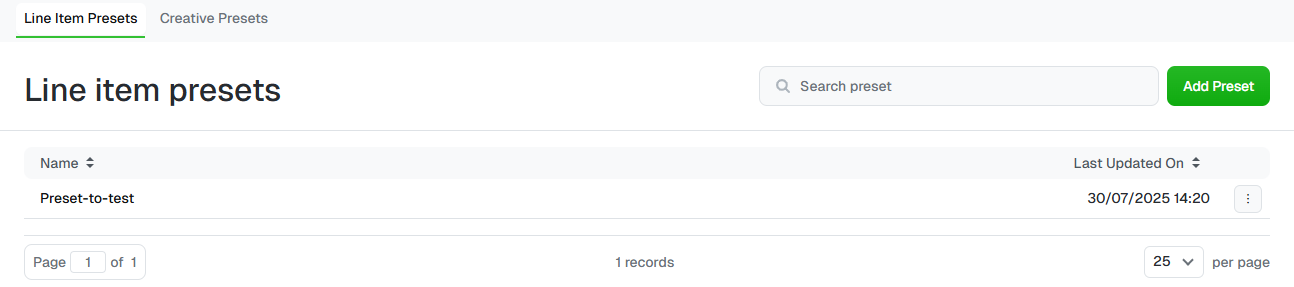
**Targeting presets** save targeting you use again and again, so your team
doesn't have to retype the same key-value rules on every line item. There are
two kinds, each on its own tab:
* **Line Item Presets** — key-value targeting rules for line items.
* **Creative Presets** — a named list of values for creatives.
 ***
## Create a line item preset
Select Configuration in the sidebar, then click the
Targeting Presets tile. The **Line Item Presets** tab opens.
Click Add Preset in the top right.
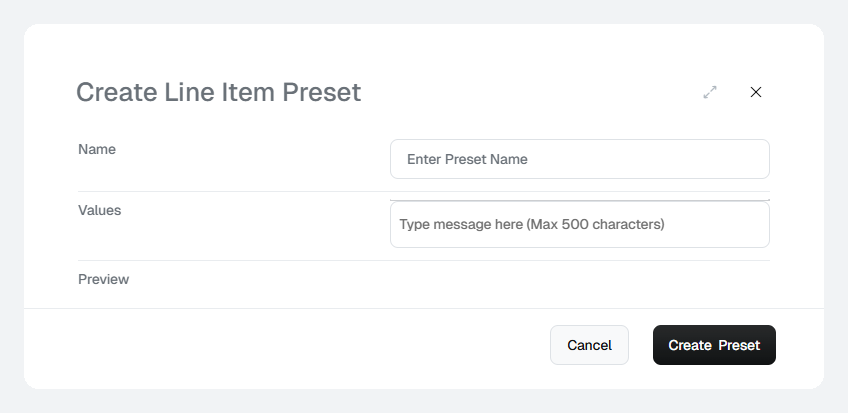
Enter a **Name** your team will recognise, such as `UK dealers 2026`.
Type your targeting rules in **Values** using the format below (up to 500
characters). The **Preview** shows how Uplift Hub reads them.
Click Create Preset.
***
## Create a line item preset
Select Configuration in the sidebar, then click the
Targeting Presets tile. The **Line Item Presets** tab opens.
Click Add Preset in the top right.
Enter a **Name** your team will recognise, such as `UK dealers 2026`.
Type your targeting rules in **Values** using the format below (up to 500
characters). The **Preview** shows how Uplift Hub reads them.
Click Create Preset.
 ### How to write values
Each rule is a `key=value` pair.
* **Commas on the same line** combine rules with **AND** — every rule on that
line must match.
* **A new line** starts another group, combined with **OR** — any one line can
match.
For example:
```text theme={null}
dealerid=393728,dealerid=396933
year=2000
```
reads as `(dealerid=393728 AND dealerid=396933) OR (year=2000)`.
### How to write values
Each rule is a `key=value` pair.
* **Commas on the same line** combine rules with **AND** — every rule on that
line must match.
* **A new line** starts another group, combined with **OR** — any one line can
match.
For example:
```text theme={null}
dealerid=393728,dealerid=396933
year=2000
```
reads as `(dealerid=393728 AND dealerid=396933) OR (year=2000)`.
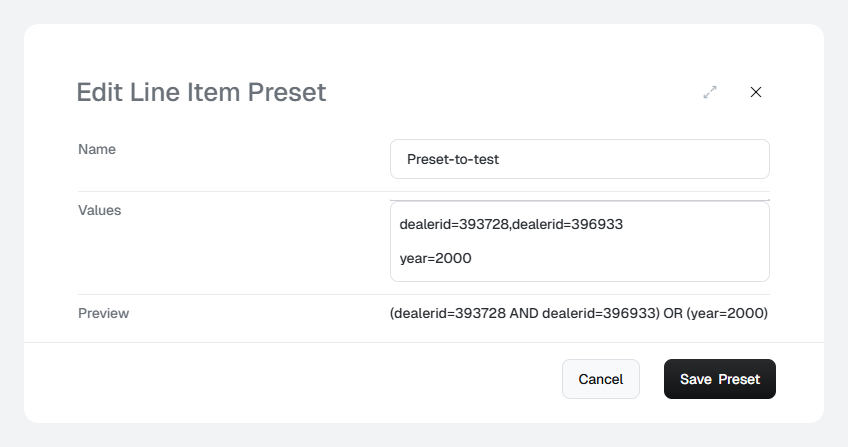 Always check the **Preview** before you save. If a group should match *any*
of several values, put each value on its own line rather than separating them
with commas.
***
## Create a creative preset
On the **Targeting Presets** screen, click the Creative Presets tab.
Click Add Preset.
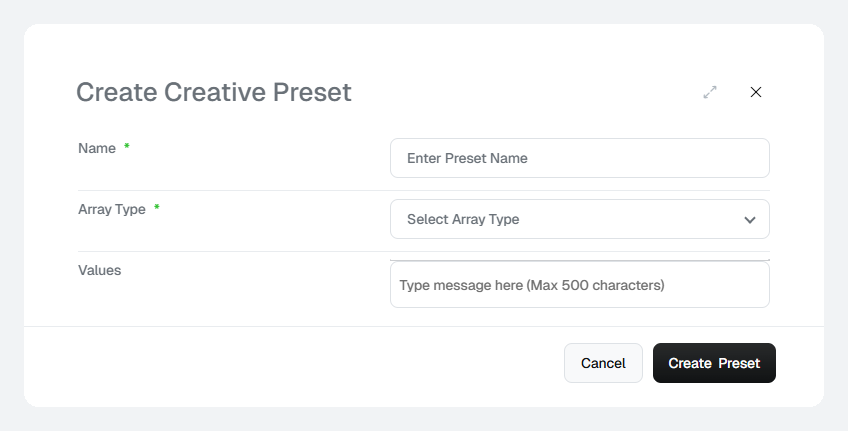
Enter a **Name** and choose an **Array Type** — `String` for text values or
`Number` for numeric values. Add the **Values** (up to 500 characters).
Click Create Preset.
Always check the **Preview** before you save. If a group should match *any*
of several values, put each value on its own line rather than separating them
with commas.
***
## Create a creative preset
On the **Targeting Presets** screen, click the Creative Presets tab.
Click Add Preset.
Enter a **Name** and choose an **Array Type** — `String` for text values or
`Number` for numeric values. Add the **Values** (up to 500 characters).
Click Create Preset.
 ***
## Edit or delete a preset
* **Edit** — click the preset's name, make your changes and click
Save Preset.
* **Delete** — click the **⋮** menu at the end of the row and select
Delete.
Use the search box to find a preset by name, and sort by **Name** or
**Last Updated On**.
See [Targeting & keywords](/line-items/targeting) for how targeting works on
a line item.
This documentation is built and hosted on [Mintlify](https://mintlify.com), a developer documentation platform.
***
## Edit or delete a preset
* **Edit** — click the preset's name, make your changes and click
Save Preset.
* **Delete** — click the **⋮** menu at the end of the row and select
Delete.
Use the search box to find a preset by name, and sort by **Name** or
**Last Updated On**.
See [Targeting & keywords](/line-items/targeting) for how targeting works on
a line item.
This documentation is built and hosted on [Mintlify](https://mintlify.com), a developer documentation platform.